
My youngest son has been sick this week. Even though he's moved out of the house (it's been a whole year... I can't believe it!) I still drove to the grocery store to pick up some 'sick foods' for him. Yesterday I picked up more Chicken Noodle Soup and Saltine Crackers. No... I'm definitely NOT Julia Childs. Some of you can whip up a yummy batch of homemade soup while multitasking, but not me! No sirree bob!!! I am trying to cook a lot more using fresh ingredients, but right now it seems I've fallen off the wagon. All I can think of is...
C H O C O L A T E !!!
With that in mind, you'd think I'd come up with something brown, or maybe sweets related huh? Nope. I decided that I'd start out with one of Susana's FABULOUS dies. This die shows what I'd like my body to look like - and I don't mean the fat orange lump at the bottom lol!
I've actually used a number of dies on this card. Blank Canvas Torso comes with the adorable matching charm. The Garden Corner dies were cut from *Washi Tape I made, the spool and buttons are from Spellbinders, and the doily is a Cheery Lynn die. Selected Spellbinders 30% OFF right now at SCACD!!!
The beautiful pattern on the torso is a combination of Teresa Collins Tell Your Story Washi Tape and homemade Washi Tape! *See below for instructions.
The crocheted piece under the charm and ribbon is a flower - at least that's what the directions said LOL! I've been teaching myself to crochet (yeah, in my spare time!). Don't you love pins? I do... SCACD has a ton to choose from HERE.
Washi Tape Woes...
As I was browsing through the craft store the other day, I came across some washi tape. There wasn't anything as nice as the Teresa Collins Tell Your Story Washi Tape I've used today - actually, there wasn't much choice at all. I ended up buying some glitter tape.
Since that dreadful washi tape experience (lol) I decided that I would make my own glitter washi tape using aluminum tape I purchased a long time ago at Walmart! Another option is using Metal Foil Tape Sheets HERE. I think the Metal Foil Tape sheets would be easier to work with...
How To Create Your Own Washi Tape
This is the process I used:

1. Using a piece of scrap cardstock for size trim the metal tape.

2. Gather sponges and 3D Stamp Paint in color(s) of choice.

3. Making sure work surface is covered, gently dip sponge in Light Blue 3D Stamp Paint then Lime Green 3D Stamp Paint. When using foil, you want a thicker coat. Don't glop it on, but be generous with the paint. I dabbed each color on randomly, repeating each color until I liked it :D

It didn't take long to dry - I was VERY surprised! Especially on a non-porous surface! Voila' it's ready!!!
4. Cut as desired in strips.

5. Adhere to scrap of cardstock. I think my washi tape fits in nicely with Teresa Collins Tell Your Story Washi Tape, don't you?

6. Using Blank Torso/matching charm and Garden Corners dies run through die cutting machine. Here are my first cuts :D
***Important Note***
Make sure to rinse off your sponges when you're done using them. I needed to soak mine for a bit, but I was able to get most of the paint off. It would have been a lot easier to put them in water right away... another lesson learned :D

This is a sample I put together to show you different effects.
1. Narrow strip on the left: Store bought glitter tape.
2. Wide strip in the middle: Rose 3D Stamp Paint on Metal Foil layered over cardstock which you can see on either side of foil. Notice the difference in color and texture.
3. Strip on the right: Light Blue/Lime Green 3D Stamp Paint on Metal Foil Tape.

This was taken right after covering with paint. You can see how it darkened up as it dried in the photo above this one...
I hope you've enjoyed learning a new technique and will try out these wonderful 3D Stamp Paints! The colors are so vibrant and have a great texture. You can't beat the drying time either!!!
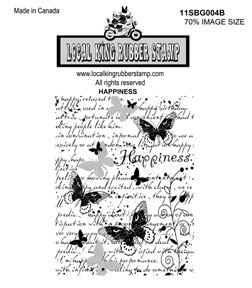
Did You Know???
I just discovered some really cool stamps at SCACD! They are by Local King Rubber. Here are some of my favorites!


Hope you had fun... I know I did!!!
May God bless you, keep you and comfort your soul~

2 comments:
Hi Lori!
What a great idea with washi tape! thanks for the tutorial! A hug!
love it! the strips would make a really pretty background on their own too :)
Post a Comment