Saturday, March 31, 2012

DT Call for CLP Sketch Challenge!

Calling all designers...


Please see CLP Sketch Challenge Blog for further information!

&

Announcing...

LAST DAY for Baby Steps Cartridge Giveaway!!!
Ends 11:59 pm PST


Have a wonderful weekend!!!

May God bless you, keep you and comfort your soul~


Friday, March 30, 2012

Susana Loves Stamps New Release!

Welcome to My Comfort Cottage :D  I'm glad you stopped by!  I hope that you enjoy your stay here and come back often to sit and chat awhile!

If you are following the SCACD Blog Hop today, you should have come from Mary's Blog.  If you'd like to start at the beginning, hop on over to see Danni!  You can find the entire HOP list at the Store Blog.

FYI:  Susana is launching some new branding for SCACD Exclusive Stamps in general, and will now be calling ANY of them Susana Loves Stamps.  To be clear, it does not mean she personally designed what you are seeing, but she did have a part in bringing it forward.  Look out for more Susana Loves projects in the works.

TA DAAAAA... Drum Roll Please!!!

Susana Loves Stamps 
presents

Eyes of Beauty Collection 

&

Eyes of Dreams Collection

I'd like to introduce you to Come Hither Eyes from the Eyes of Beauty Collection.  Aren't her eyes amazing???  I LOVE them!


You know how much I love my copics... lol - of course she's colored with them.  Hair - E49 E59 E25 E53; Skin - E11 E00 E000; Eyes- BG15 BG13 BG11 BG10; Wings and clothing - YR09 YR12 YR02 YR01 YR00 BG15 BG13 BG11 BG10.  Her eyes were given some shine using Transparent Gloss Gel and just the tiniest bit of stickles in her barrette.


I've used a number of the dies in the Shapeabilities Sewing Elements set on this card to cut out the pincushion, scissors and buttons.  So that the needles would be silver instead of the color of the pincushion, I first die cut the pincushion with a piece of  Metal Foil Tape Sheet, then I die cut again with the dp which is My Mind's Eye Howdy Doody, and cut off the needles before adhering it to the foil layer.  *All die cuts created using Howdy Doody which is a double sided 6x6 paper pad.


In this photo you can see the SHIMMER and SHINE the Silks Acrylic Glazes create.  Here I've used Nutmeg for both spools.  The small spool has a lighter coat than does the card layers.  I love the richness of this color!  The background paper has a thin coat of Solar Gold Silks brushed across, which you can really see in this view.

The button card is a freebie from the Graphics Fairy and I added the graphic at the top.  Believe it or not, I actually tied on each button to the card before adhering it with glue... what kind of glue you ask? lol

ScraPerfect Best Glue Ever!!!  Seriously.  No joke.  I used it to adhere EVERYTHING on this card.  I absolutely love love love it!!!


Since this is a sewing themed project, I used a spool SVG which I created to cut out the card base.  In a previous post, I offered the smaller spool (which I have baker's twine wrapped around here) but now I am offering a FREE Spool Card which comes in the following formats:  SVG, PNG and PDF.  It includes the card base, the card front and layers.  Download will be at the bottom of this post.  Enjoy!

Card base is Kraft, layers are beige cardstock - first layer edged with Black Soot Distress Ink; top layer painted with Nutmeg Silk Acrylic Glaze and distressed with Black Soot.  My intention for this card was to create the look of wide ribbon on a spool and then build on top of that.  Well... like I said, that was my intention lol!

*International orders may be placed with Elaine at Quixotic Paperie!!!

Your next stop is

*Candy Ends tomorrow... Baby Steps Cartridge Giveaway *Here*

I've entered the following challenges:
Simon Says - Anything Goes
Lollipop Crafts - Anything Goes
Outlaws Copic Challenge - Anything Goes

Thanks for stopping by!

May God bless you, keep you and comfort your soul~


*** Download Spool Card:  SVG *Here*   PNG *Here*   PDF *Here*


Wednesday, March 28, 2012

Amazing 1-2-3 Cake and SCACD News!!!

Look what I found!!!  I am re-posting from Diane Cosby's blog, The Hidden Pantry *Here.*

I am such a chocoholic... of course I'll use Dark Chocolate cake mix with the Angel Food cake mix, but you can use any flavor with this 1-2-3 Cake recipe.  Check out the directions below:

Aunt Betty's 1-2-3 Cake

I just love when friends and family send me new things they have found and they invite me to try them too.  My husband's Aunt Betty sent me this a few weeks ago and I just got around to trying it out and it is a WINNER!!

You could even make this up and give a Christmas gifts  either the whole recipe or in a small glass jelly jar with the directions to make more and how to mix up and bake.  As a quick and lightly laden (calorie wise) desert it is a find.

You simply assemble as follows:

1 box Angel Food cake mix
1 box any flavor cake mix

Directions:

Using a large plastic bowl with a tightly fitting lid or a large zip lock bag, combine the two boxes of cake mix stirring or shaking well.

For each individual serving,  take out 3 T. of the cake mixture and mix it with 2 T. of water in a small microwave safe container.  I used a small coffee mug.  Microwave on high for 1 minute.  You now have your own instant individual cake and it is warm and inviting.  You can top with a dollop of fruit or whipped topping if you like.

Try various flavors of cake mix but it must always be combined with an Angel Food mix.

Keep the mix tightly sealed in an airtight container until used and remember:  This recipe is called 1-2-3 Cake because all you need to remember is 3 T. mix, 2 T. water, and 1 minute in the microwave.

And a big thank you goes out to Aunt Betty!


...and thank YOU, Diane for posting this gem!  I think I need to head to the grocery store now...

SCACD NEWS UPDATE!!!

Susana Loves Stamps 
is proud to present
________________

Eyes of Beauty Collection
&
Eyes of Dreams Collection

Hold on to your hats cuz this release is 
super duper FABULOUS!!!  

Mark your calendars for this Friday, March 30.  
You don't want to miss it!

** Today's Designer Sneak Peek comes from **

Melanie

Her creations are always over the top amazing!
You will definitely find lots of inspiration!

See you tomorrow


May God bless you, keep you and comfort your soul


Monday, March 26, 2012

Come Play with Me at SCACD!!!

Welcome to a new week!  Did you have a good weekend?  I spent all day Saturday in my jammies :)  It felt so good to kick back and play a little in my craft room.  I also made some yummy bread in my bread machine.  I love fresh baked bread... just smell that delicious aroma - ummmmm...

Did you miss Susana last week?  I sure did!  But TODAY the store is open-open- open... *nose pressed against the glass window* :)  Yay!  Susana has geared up and is ready for business with a ton of FUN!!!

Feast your eyes on these new goodies:
I also have a cute li'l card for ya - imagine that!  This sweetie was made for a precious soon-to-be 7 year-old.  For her birthday party, she is going to dress up as The Little Mermaid!  Isn't that cute?

It's hard to see, but I've used a photo of her quilt to piece a quilt background using Square Swatches Nesties... I wanted this card to be personal and extra special :)  I do hope that she likes it!


She's colored with copics:  Hair - E35 E33 E31 E50 YR21 YR20; Skin E11 E00 E000; Greens - G85 G82 G40 C4; Pinks - RV34 RV32 RV10 RV00 RV000; Purples - BV04 BV02 BV01 BV00 C4; Rock - E55 E53 E51 E50 C4.  Susana now has Shinhan Markers Here.  I've embellished the bubbles and parts of Elania's body with Stardust Stickles.

After coloring and die cutting using Rectangle Nesties I covered the whole piece with Ice Silks Acrylic Glaze.  I'll have a photo below so you can hopefully see the shimmer this NEW glaze has.  As you can see, it's transparent, so your beautiful work will shine through :)

I made extra bubbles using Transparent Gloss Gel (also for her eyes).  I love this gel!  It holds it's shape and in the right light, you can see the sparkle through it!  Awesome product!

I know you can't see it here, but I also gave the swirl a couple of coats of Ice Silks.  It's not overpowering, but gives quite a nice shimmer.  To that, I added more 'bubbles' with the Gloss Gel.

She's popped up with dimensionals, but everything else is put together with ScraPerfect Best Glue Ever.  Yes, I will say it again, this really IS the BEST GLUE EVER!  I've never used glue to put a card together... until recently when Susana brought in Best Glue Ever.  Here's why I love it:
  • You only need a small amount to hold your layers together - a little goes a long way.
  • It does NOT wrinkle the paper... at all!
  • It dries clear and is flexible. I've used glues in the past that crack and crumble :(
  • Depending on the card, I have used approximately 5 feet of adhesive - for 1 card!  That adds up to a lot of adhesive and a lot of money.  When I try to skimp, I find things don't hold as well...
  • I can position my paper and adjust it as necessary.  Can't do that with adhesive without ripping your paper!
  • I don't have to reload a difficult 'gun' - believe me, that saves me a TON of time lol!
  • It's just plain convenient!  I'm gonna buy stock in this stuff :)

Here's the photo that shows the shimmer on everything.  I hope you can see it on the white.  The Ice Silks gives it an elegant look!

See?  Everything is good and stuck on the card base!  Even the heavier ribbon topped charm and pin are not going anywhere lol!

I hope you've enjoyed a peek at what I've been creating lately.  I will soon have some links for ya so you can see more NEW coming up for SCACD!!!  Tell Susana that I sent ya :)

I love you, my sweet friends

May God bless you, keep you and comfort your soul~


Thursday, March 22, 2012

Sweet Little Onesie!

I don't know about you, but I adore anything small... doesn't really matter what it is, it's just c.u.t.e.!!!  Little shoes or sandals are high on the list, but anything BABY is simply adorable :D

Did you grab the Onesie printable yet?  Below is a card I made using it!


The Onesie shape and digital papers are from Scrap Girls (love their stuff!)  The scalloped background I snagged from Bird's freebies.  I used my Cricut to cut it out.  I was impressed at how well it did cut - thanks Bird!!!  I love the embossed roses too (Cuttlebug).

I show you this angle so you can see that the Onesie by itself could have been made into a card by itself.  It even stands up alone... such a big Onesie lol!

Can you believe that I did absolutely NO coloring on this one?  It was nice for something different.  The ticket and sentiment is from Stampology, I believe I received the flower from Magnolia-licious and I have lots and lots of lace and ribbon in my stash :)


I've entered the following challenges:
Creative Inspirations - Anything Goes
Cute Card Thursday - Anything Goes
Love to Create - Anything Goes
Paper Sundaes - Photo Inspiration
Simon Says - Bingo (Flowers. Lace, Ribbon)
The Poodles Parlour - Anything Goes
MilkCoffee - Anything Goes
Paper Crafting Journey - Pretty Pastels


I think it might be time soon to have another ribbon and lace giveaway!

 BUT...

There is still time to get in on my 
Only 9 days left to enter!

Thank you for taking the time to stop by today.  I cherish your friendship

See you soon!

May God bless you, keep you and comfort your soul~


Tuesday, March 20, 2012

I'm Trying a New SVG Thing!!!

Hey there!  I don't know what's got into me, but I'm in a learning phase.  Yes, I know that's a good thing, but to tell you the truth, I haven't been able to create cards because I'm always searching for new techniques, and learning a few new computer programs!

So... to celebrate my new found abilities, I've prepared a file for you to grab.  I'm going to use this SVG file on a project which I'll post next Friday.  It's going to be a sewing themed card, so I thought using this spool would be appropriate!
I have a Cricut which I've dusted off and have been using a little bit lately.  This cutting file includes 12 one inch spools for your crafting pleasure : D  I'm planning on wrapping mine with embroidery floss.  What can you come up with?


If you download, please leave me a comment letting me know if everything works properly : D

Thanks!

My Onesie Card is drying as we speak...  I'll have it posted for you tomorrow so you can see how easy they are to use (in case you missed them, you can find the FREEBIES here and here).

Have a wonderful day, my friends!  See you soon

May God bless you, keep you and comfort your soul~


Saturday, March 17, 2012

Freebies and German Chocolate Fudge Bites

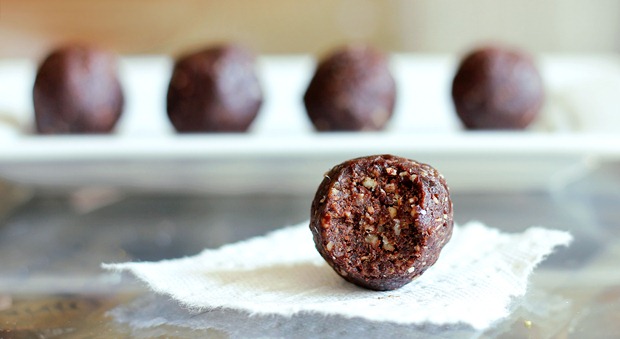
Maybe it's because I'm hungry right now, but my mouth is watering over these healthy Fudge Bites!  I discovered this recipe today posted by Katie *Here*

You know that I've got to try these!!!  How 'bout you?
*Freebies are posted below...


I taste like a fudge brownie.
german chocolate truffles
A deep chocolate fudge brownie.
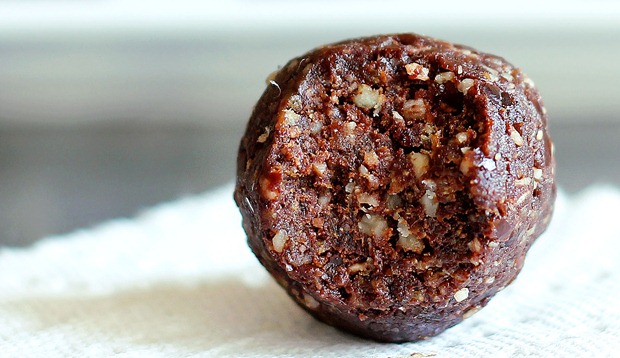
The following recipe defies all logic. No one will ever guess that such insanely-fudgey chocolate balls could possibly be 100% free of sugar, butter, and flour.
Shhhh… no need to tell anyone they’re healthy. Winking smile
german chocolate truffles
Healthy? Who, me?
German-Chocolate Fudge Bites
(Makes 10-14 balls)
These were inspired by this recipe.
  • 3/4 cup pitted dates (I like Sunmaid, because they are softer.) (120g)
  • 1/2 tsp pure vanilla extract
  • 1/16 tsp salt
  • 2 T cocoa powder (or raw cacao powder)
  • 2 T shredded coconut
  • 1/3 to 1/2 cup raw pecans
  • optional: feel free to add some chocolate chips
Blend all ingredients together very well. (I recommend using a food processor.) Squish the dough together. (I transferred the dough to a plastic bag then smushed it together in the bag. It’s much less messy this way!) Roll into balls, cookie-cuttered shapes, or bars… or you can even use it for a pie crust!
Click the following link to see: Calories + Nutrition Facts.
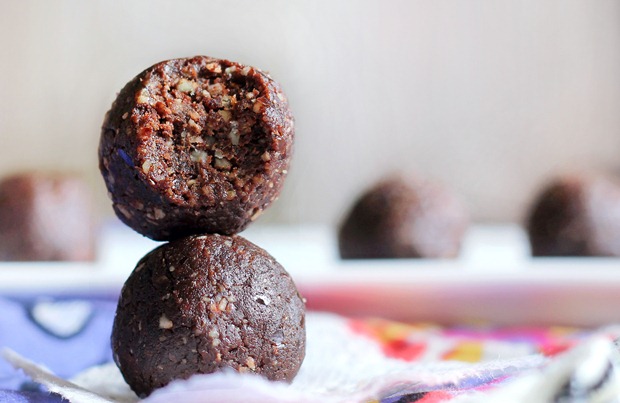
They’re pretty much everything you could ever want in a bite—coconut, pecans, and lots and lots of chocolate! On today’s to-do list: make more fudge bites. I’ve already eaten them all!
chocolate energy ball
That's it!  I hope you'll make a batch too :)
Today's Freebies
Embellished Onesie


 Bib

Flower

 A cute li'l pocket...

I created these in Photoshop Elements using Scrap Girls tools and images.  All files are in png format.  In case you missed the Printable Onesie Card, you can find it Here.

Thanks for visiting *exclamation* (that key doesn't work on my keyboard right now lol)

May God bless you, keep you and comfort your soul~

Thursday, March 15, 2012

A Cutie for CLP Sketch Challenge!

I've finally got a card to share... woot woot!  I know, I've been slacking on that lately cuz I've been in 'school' learning about Photoshop Elements.  I love the idea of mixed media and have posted a few projects here and there in which I've dabbled in hybrid projects.  I've even used clay (I'm dying to use more!).  In the next few weeks though, I'll be showing new products and techniques - yay for new techniques!

But for today, I have a tried and true card to show you which I created for CLP Sketch Challenge #45.  Here's another one of Chelsea's amazing sketches (thank you, Sweetie!!!)


This is Give Peace a Chance by Sylvia Zet for SCACD.

Can you hear her saying, 'He loves me - He loves me not - He loves me....'?  I love her beautiful flowing hair!

I've entered her into the following Challenges:  Joanna Sheen - Spring is in the Air; Sir Stampalot - Take Inspiration (From Ruth's DT card using blue/green and flower!); The Crafter's Cafe - Ribbon and/or Lace; Creative Card Crew - Vintage; Simon Says - A bit 'o Green; Stampavie and More - Spring/Easter

Paper is from the Kaisercraft Sweet Nothings 6x6 paper pad.  I thought the 'tye-dye' look was appropriate for this image lol!  She's colored with copics:  Pants - B97 B95 B93 B91 B37 C7 C5; Top - G28 G24 G21 G20; Flower - YR24 YR21 YR20 YR14 R14; Hair - E35 E34 YR21 YR20; Skin - E11 E00 E000; Flower Centers - E18 E17 E13 E11 E02; Flower Stem - YG67 YG63 YG61 YG11; Shoes - E47 E44 E43 E42 E41 E40 C9.

Products and supplies used Give Peace a Chance stamp; Sentiment is from the Ticketed stamp set by Stampology; Kaisercraft Paper Pad (out of stock on Sweet Nothings, but check out the fabulous selection Here); Tuxedo Black Memento Ink PadSepia VersaFine Ink Pad; Faded Jeans Distress Ink; Copics (check out Susana Loves Markers Here); Stardust Stickles; Transparent Gloss GelGlamour Dust; MS border punches; paper doily; tulle; flat back pearls; button; Tim Holtz scissors (used to cut the shank from button); dimensional foam and BEST GLUE EVER*

I discovered a tutorial on Pinterest that gave directions on how to use punches in various ways.  The 'lace' border at the top with the pearls in the center was made according to those directions *Here*  Why not get the most use from the tools we have?

*BEST GLUE EVER
OK... I am not an OMG girl, but My Goodness, this is the BEST (not kidding!) glue E V E R ! ! !  This is the first card I've created using ScraPerfect Best Glue Ever.  I must say that I was skeptical.  I mean really... isn't glue pretty much glue???  This glue totally blew me away!  From now on, I will use this for my adhesive instead of my ATG; Tombow or Glue Glider Pro.

The ONLY thing that I was not happy about was adhering the tulle which was knotted in the middle.  For that, as well as the button, I will continue to use Aleene's Super Thick Tacky Glue.

You only need a small amount of Best Glue Ever.  It does NOT wrinkle paper and holds extremely well.  A definite plus to using this glue over various tapes is that you can reposition your paper if you don't get it right the first time!  It dries permanent, but if you want repositional, you can apply to the surface and let dry before adhering to another surface.  I'm tellin' ya that they got the name right on this one!!!

You can find Best Glue Ever *Here*

Who would've thought I'd write a novel on glue???  Ah... the life of a crafter :)

I'm off to wash my hair and go to Bible Study...  I'll be back with the rest of my FREEBIES for ya.  Did ya miss the first FREEBIE?  You can find it Here!  Did you miss my Baby Steps Cartridge Giveaway?  You can find it Here!

Love you tons, my friends

May God bless you, keep you and comfort your soul~

Wednesday, March 14, 2012

Free Printable Onesie!!!

I've been playing around with Photoshop Elements lately.  I've also been wanting to do a Onesie card, so I've decided that I'd share my file with you.  This is a printable version.  I also have a couple of embellishments that go along with this, but you'll have to come back for those lol!

I hope that you can use this in your crafting.  Resize as necessary.  After printing and cutting out, I folded into a card, but it didn't match up 'exactly' so I had to make a few adjustments, but you can't tell by the finished card.  I'll have that posted in the next few days...

Click on the image and save to your computer.  Enjoy!

Onesie shape and digital paper courtesy of Scrap Girls.  
One of my FAVE digi places to shop!

Coming up...
  • CLP Sketch Challenge Midway Reminder!
May God bless you, keep you and comfort your soul~


Tuesday, March 13, 2012

Giveaway at Creating From the Heart!!!

Have you seen this giveaway?  It's the LAST DAY to enter...


I'll be back with my FREEBIE I promised ya...  
I have another surprise for you also : D

May God bless you, keep you and comfort your soul~

Crock Pot Pizza Casserole Re-Post

It's been so cold lately, I've been looking for warm, easy, crock pot recipes (emphasis on easy!).  Here's a mouth-watering recipe I found on Mom's With Crockpots posted by Amanda *Here* for Crock Pot Pizza Casserole.  Yum!


Crock Pot Pizza Casserole
 Ingredients
  • 16 oz. box Spiral Pasta (uncooked but rinsed)
  • 1 pound lean ground beef
  • 1 onion, chopped
  • 2 cloves garlic, minced
  • 1 green bell pepper, chopped
  • 1 cup sliced pepperoni
  • 16 oz. pizza sauce or pasta sauce
  • 1/4 cup water
  • 1 cup shredded Mozzarella cheese

Directions

1.  Spray large crock pot 6 qt. or larger with non-stick spray
2.  In a medium skillet over medium-high heat, brown the ground beef with the onion, garlic and green bell pepper.  Drain excess fat.
3.  Rinse pasta and place in the crock pot with drained ground beef mix.  Stir. Pour pasta sauce and 1/4 cup water over noodle mix.
4.  Top with shredded Mozzarella.
5.  Cover and cook on low for 6-8 hours (no peeking)
6.  Serve with a side salad

I'm not really a pepperoni girl... although the rest of my family is, so not sure if I'll
be adding the pepperoni.  It will depend on who will be home for dinner - kwim?  I
definitely will be using very lean ground beef, that's for sure!

Anyway, hope you enjoy this recipe.  Today, I'm making the Crock Pot Chicken
Tacos I posted yesterday!

Tomorrow, I'll have a FREEBIE for you to snag if you so desire : )  I've been
working on a custom card and have made a special sentiment.  I thought you might
like it too!

Thanks so much for stopping by.  I'll see you again tomorrow!!!

May God bless you, keep you and comfort your soul~

Monday, March 12, 2012

Crockpot Chicken Tacos!!!

I have something totally new for you today!  I was so excited when I found this recipe on Sarah's blog (Here) that I had to share it with you!  Just ask my husband... I am not a cook - good or otherwise...  I'd much rather be spending my time getting my hands messy with stamps and copics lol!


This recipe sounds quick and easy which is a definite plus for me : D  You can be assured that as soon as I can get to the grocery store, this will be on the dinner table!


Enjoy...


Crockpot Chicken Tacos
Recipe from Tasty Kitchen

1 envelope Taco Seasoning
6 pieces Boneless, Skinless Chicken Breasts
1 jar Salsa (16 oz)

Dump everything into a crock pot and give it a little stir to blend the seasoning with the salsa. Cook on high for 4 to 6 hours or on low for 6 to 8 hours. When done, the chicken should shred easily when stirred with a fork.

For tacos, serve the chicken with soft flour tortillas, lettuce, shredded cheese and sour cream. This is very versatile and can be used for enchiladas, nachos, tostadas, etc. Any leftover chicken can then be used for tortilla soup (make it the next day or freeze the chicken to use at a later time).


Have a wonderful day!!!

May God bless you, keep you and comfort your soul~

Sunday, March 11, 2012

Papercraft Magazine Giveaway

Well, I've done it again...  I thought the cover of the magazine looked familiar, but when I peeked inside at the wonderful creations, I knew that I hadn't poured over them yet.  Into the cart it went!

It was another story when I got home and discovered in my craft room (it's been quite a mess lately) a magazine that looked suspiciously familiar...  My goodness, do I really have that much stuff that I can't keep track of it all?  Sadly, yes...

But... my boo-boo is good news for someone else.  The first person who lets me know that you'd like my second copy of the Spring 2012 issue of Papercraft Magazine wins!!!

Please leave a comment on this post only.

** Cricut Baby Steps Cartridge Candy is below this post!  Ends March 31 **


See you soon (hopefully with a project!)

May God bless you, keep you and comfort your soul~


Tuesday, March 6, 2012

Candy Do-Over!!!

**THIS CANDY HAS ENDED... Waiting to hear from winner 4/4/12

Thank you SO MUCH for your help in retrieving my sidebar goodies!!!  I don't know about you, but when something isn't right, it bothers me and I work on it until it IS right!  I suppose that could be both a very good thing, and maybe not so much lol!

So now, I can move on to better things.  Almost.  In remedying my sidebar issue, I had to delete a post.  Guess which one? THE CANDY - ugh.  Now I'm afraid to try the linky again.  What trouble he's been!!!  Why can't things just work out my way all the time LOL LOL LOL LOL!

Anywho... to make me happy, I'm going to add a 6 x 6 paper pad to the candy this week!  So far, here's what you could win:


Plus one 6 x 6 paper pad of my choice from
SCACD  : D

Who knows what else might be added???  Stay tuned...

What is required to be entered into my Baby Steps Candy?  I've noticed that some people have blogs set up for candy only.  If you fit into that category, please do not enter as this Candy is for 'Followers' - meaning that every once in awhile I see your sweet smiling face here : D

Although not required, I would absolutely love it if you would post the above photo  on your sidebar, in a post, or some other way to let others know!  That's it!

OK... on to bigger and better things.  I am preparing to bring you some awesome NEW ideas for your artwork!  Yay for NEW TECHNIQUES!!!

Thanks again for your help in resolving my problems : D  You are ALL the best ♥

May God bless you, keep you and comfort your soul~


Monday, March 5, 2012

What Happened to My Sidebar?

OK... this is really frustrating!  My sidebar has disappeared (actually, it's at the bottom of all the posts!).  Is anyone else having trouble with blogger???  In layout view, it's all where it's supposed to be...  Can you see anything in my sidebar???

Help pleeeeeeeeassssse!!!

See you soon my friends

May God bless you, keep you and comfort your soul~

the countdown...

Get your own free Blogoversary button!
Related Posts with Thumbnails