Friday, September 28, 2012

A Fabulous SCACD Release You Don't Want to Miss!!!

I am soooo jazzed... I can hardly contain my excitement!!!  If you've never followed a Blog Hop before, this is surely the one you want to start with!  If you are a seasoned veteran, well hang on to your hats folks... these are really really gorgeous!!!  So... let's begin!

If you are hopping with us today, you should have come from Danni's blog which is the beginning : )  If you get lost along the way, you can find the entire hop list on the store blog.

YAY!!! Time for another exciting SCACD Stamp Release!!! SCACD is thrilled to bring you the follow up to the super sweet Eyes of Beauty and Dreams Collection with the Newest Eyes of Adventure and Fables Collections. We definitely think the Eyes have it!!! These eyes just capture your heart, and even better each stamp comes with an accessory image!!! Today I get to introduce...


Isn't she lovely?  I almost can't stop looking at her, she's soooo pretty lol!!!  This beauty carries a sweet flower pot with a daisy (you'll understand later WHY I'm mentioning this!)

She's colored with copics (I'm in Sacramento today with Debbie Olson for Copic Certification - YAY!!!  I can't wait to learn more more more!).


I chose to show off Vintage Eyes with a Black-Eyed Susan stencil using gorgeous, gorgeous 3D Stamp Paint in Moss Green and Rose.  I LOVE LOVE LOVE 3D Stamp Paint!  I'll show you next how I created this easy background :)

The only embellishments I've used is Viva Decor Paper Pens in Yellow and Opal - now ON SALE!!!  These make easy pearls in a snap!

Stenciling with 3D Stamp Paint


Step One:  Choose your stencil and secure to paper with tape.  I used a heavy weight Mixed Media paper by Strathmore so I wouldn't have to deal with curling and warping :D

Step Two:  Open your paint and have sponge(s) ready because you'll need to work fairly quickly.  Although it's not a big deal if you take your time, the longer the paint is on the sponge and stencil, the harder it is to clean...


Here, I've already stenciled the 'daisies' with the larger sponge in Rose, and am finishing up the Moss Green with a smaller sponge.  *Note:  I was not particularly concerned if colors ran into the 'wrong' areas, but if you want a cleaner look, cover up the areas you wish to remain pure while you change colors.


Step Three:  As soon as you're done sponging the paint, carefully remove the stencil.  Most likely the paint will already be dry... no kidding!  Just look at the shimmer and shine!!!  This is the most textured and shimmery paint  I've used before... just beautiful : )

Step Four:  Clean your tools.  I mean it lol!

Next up is... Vintage Eyes by Susana Loves Stamps.  WHAT?!?  That is not an error hee hee.  Just wait!!!


Oh I had so much fun creating this card!  The first thing to note are the dies by SCACD I used.  Very, very cool... Ornate Hinge and Ornate Doorplate with knob.  I left the hinges cardstock white, but the doorplate and knob I sponged with 3D Stamp Paint in Gold (I don't see gold currently in the store).  WOW!  This paint is simply amazing.  You only need a little and it covers in one coat beautifully.  It is a thick, textured paint and oh so FUN :)

I cut out the door panel with my Cameo (another LOVE!).  The hinges already have holes to insert brads, so I placed them over the edge of the door and marked with a pencil so I'd know where to punch with my 1/16" hole punch.

The card front is covered with a piece of lace I purchased at Joann's on sale yay... during which time I also found this fabric on sale with the little 'ornaments' I cut out to make a banner.  The banner string is Sew Easy Floss in Deep Ocean (20% OFF!) HERE.

***News Flash***
ACK!!!  Do you like the itty bitty ornaments I used?  You can find similar Itty Bitty Stamps HERE!  They are sooooo adorable!  I'm gonna go grab some before they're gone!!!  If I only knew before I created this card lol!


Just look at the gorgeous detail of THIS die cut and the paint didn't even goop up!  Oh... To make the knob stand out, I used two dimensionals and painted over the knob again so the 'white sticky' wouldn't show through.


Ta Daaaaaaa!  The other side of the door... but not inside of the card!  It's Vintage Eyes!!!!!!  But wait... she not only looks different because of the colors I've used, take a look at the flower pot in her hands.


Vintage Eyes comes with this Poinsettia accessory stamp woo hoo!!!  To get this look, I used my craft knife to make a slit above and below her hands so the flower pot slid in (I did trim the pot a little on the sides to fit better).  The daisy is behind the poinsettia, but the only thing you can see of it are a couple of the leaves which blend in :)  ***So to be clear:  I've used the image with the Daisy, but covered the Daisy with the Poinsettia...

Here are the Copic colors I've used: E57 E55 E53 E51; E11 E00 E000; B26 B24 B02; G28 G24 G21 G20; R89 R29 R27 R24 R22 YR21.

*ShinHan Markers can be found HERE*

Beginning with this release, I decided I wanted to use Pebbles Chalks for the cheeks (I really like this!!!).  They are sooooo much easier to blend than copics for me.

Last, but certainly not least... everything on both of these cards were adhered with ScraPerfect Best Glue Ever!


For our International friends, this NEW RELEASE
is available at Quixotic Paperie.

Your next stop is Amanda!

Thanks so much for visiting ♥

May God bless you, keep you and comfort your soul~

Monday, September 17, 2012

Time for a New Sketch at CLP!

Oh.... I am getting farther and farther behind!  It seems the faster I go, the more behind-er I get lol!  Don't you feel that way sometimes?  There are so many areas in our lives that need attention.  If we work on... let's say housework (boo!) that area is great (at least for a short time!) but other FUN things like crafting get neglected.  Of course, the same is true in any area which we spend a lot of time.  For some reason, I have too many areas.  How did this happen???

In my perfect world, I would definitely have a maid who not only does windows, but also shops and cooks :D  But alas, if all I did was craft, that would eventually become boring and 'work' *gasp!*

So... to save a bit of time, I'm going to post two of the three cards I have ready to share with you.  The first one is for CLP Sketch Challenge #51.  Don't you love Chelsea's sketches?  I know I say that a lot, but it's true!!!  The current challenge ends September 30.  Won't you join us?

The image I've used is The Misunderstanding by Elisabeth Bell for SCACD.  This li'l pair just cracks me up!  That's why I decided to use the sentiment SMILE which you'll see farther down this post :D


Papers I've used are from BoBunny's Very Vintage Double Dot Designs.  All dots... just LOVE polka dots!!!

The grunge doily (which matches this pair's attitude) is a Tim Holtz Alterations edge die, Distressed Doily.  You can find other Tim Holtz dies HERE.  If you're looking for distressed, mixed media products, look no further... Susana has a TON of new products in the Mixed Media Store!!!

Border lace doily is MS deep edge punch.  I found these great buttons in the beading section at Hobby Lobby!  The buttons I used as charms are tied with Scrapper's Floss.  Sentiment is Heidi Grace I picked up at JoAnn's.  Yes, I do know my craft stores very well lol!!!

The 'behind the scenes' product I must mention is ScraPerfect Best Glue Ever!!!  If this is the first time you've visited, I have to tell you about this amazing glue!

Everything (except the sentiment) is adhered with Best Glue Ever.  A little goes a long way cuz this glue is ultra strong.  I gave up using my expensive tape runners - I found that I would hesitate to layer my cards because it would use more tape!  Best Glue Ever is very economical.

If you decide to try the glue, you may want to also purchase ScraPerfect Best Cleaner Ever.  It will clean up any glue you may happen to get on your hands with ease.  But don't stop there... this cleaner cuts the heavy goop from your work surface too!

Next up is a sweet friendship card.  This card is my true style.  To me, it resembles Victorian romance ♥


I wanted to create a journal looking card.  The hinges are dies by SCACD called Ornate Hinge.  Don't you love the elegance of these dies?  To 'attach' the hinges I've used tiny gold pearls :D  You can find pearls and rhinestones HERE and HERE.

I painted the metal corners gold (they were silver) using Silks Acrylic Glaze, Solar Gold HERE.  The beautiful ornate focal die cut is from Whimsy Stamps.  It's made of chipboard and I also painted it with Solar Gold.  Sentiment and die are from Whimsy Stamps.

GORGEOUS GORGEOUS paper is Market Street 6x6 Paper Pad by My Mind's Eye.  I have TWO of these pads cuz I adore 'em lol!  Can't find this particular pad at the store, but lots of others on sale at SCACD HERE.

I made the band around the card with this pretty li'l rose lace I picked up on one of my adventures...

Thanks for stopping by!!!

♥♥♥ Next up is something very different for me... a grunged up, foiled and stenciled Happy Birthday!

May God bless you, keep you and comfort your soul~

Thursday, September 13, 2012

Homemade Oreos Repost and Brand New Products!


Hello friends!  I saw this posted on Pinterest and had to share it with you!!!  As you know, I am a Chocoholic... just saying the word chocolate makes my mouth water lol!


The following is a repost taken from Jen @ My Kitchen Addiction.  Enjoy!!!


Homemade Oreos


These homemade oreos are easy to make. They are based on my recipe for vanilla bean sugar cookies.  By adding dutch process cocoa, they have the dark chocolatey flavor of oreos. Paired with a quick vanilla buttercream filling, I happen to think they are better than the originals. Of course, if you’re friends with my hubby on Facebook, you already knew that.


Homemade Oreos(Makes approximately 3 dozen)
For the cookies:
  • 1 cup (2 sticks) unsalted butter, softened
  • 1 cup granulated sugar
  • 1 egg
  • 1 teaspoon pure vanilla extract
  • 2 cups all purpose flour
  • 3/4 cup dutch process cocoa powder
  • 1 1/2 teaspoons baking powder
  • 1 teaspoon salt
For the filling:
  • 1/2 cup (1 stick) unsalted butter, softened
  • 2 tablespoons half and half
  • 1 teaspoon pure vanilla extract
  • Pinch of salt
  • 3 – 3 1/2 cups powdered sugar, whisked to remove any lumps

Begin by preparing the cookies.  Combine the butter and sugar in a large mixing bowl, and beat on medium speed until light and fluffy.  Add the egg and vanilla, and beat until well incorporated.

Meanwhile, whisk together the flour, cocoa, baking powder, and salt. Gradually add the dry mixture to the creamed mixture, beating on the lowest speed.  Continue to mix on the lowest setting until the dry ingredients are just incorporated.

Divide the dough in half, and shape into two discs.  Wrap in plastic wrap and refrigerate for 1 hour.
When the dough is chilled, preheat the oven to 350°F.  Line a baking sheet with parchment paper or a baking mat.  Set aside.
Taking only one portion of dough out of the refrigerator at a time, turn the dough out onto a lightly floured surface.  Roll the dough to 1/8 – 1/4-inch thickness.  Use a cookie cutter (approximately 2 inches in diameter) to cut out cookies and transfer them to the prepared baking sheet.

Bake the cookies for 12 minutes, then transfer to a wire rack to cool completely.
Once the cookies are cooled, prepare the filling.  Combine the softened butter, half and half, vanilla, and salt and beat until combined.  The mixture may be a bit lumpy, but will come together.  Add the powdered sugar gradually, approximately 1/2 cup at a time, until the filling comes together.  It will be slightly stiffer than a cupcake frosting.

Transfer the filling to a piping bag fitted with a large round tip.  Pipe the filling onto half of the cookies, and top with the remaining cookies to form cookie sandwiches.
YUM!!!!

**************************************************************************************

New Product Alert!!!

Gorgeous Melissa Frances Hangers HERE


Prima Resist Canvas HERE


Impression Obsession Stamps (& Dies) HERE


New 6x6 Paper Pads HERE


Coming up next...  A shabby chic card for a 'Cherished Friend'!

See you soon :D


May God bless you, keep you and comfort your soul~

Sunday, September 9, 2012

Oh Sew Sweet Washi Tape Tutorial!

Welcome back my sweet friends!  I've actually had a bit of a down time from my computer for the last week.  Of course that didn't keep me from doing a little visiting using my phone, but it's just not the same and seems to take foreverrrrr!  I suppose it's more of a bittersweet feeling that I've missed my computer so much - I'm sure that you can relate!  If all we do is visit, nothing else gets done :(

My youngest son has been sick this week.  Even though he's moved out of the house (it's been a whole year... I can't believe it!) I still drove to the grocery store to pick up some 'sick foods' for him.  Yesterday I picked up more Chicken Noodle Soup and Saltine Crackers.  No... I'm definitely NOT Julia Childs.  Some of you can whip up a yummy batch of homemade soup while multitasking, but not me!  No sirree bob!!!  I am trying to cook a lot more using fresh ingredients, but right now it seems I've fallen off the wagon.  All I can think of is...

C H O C O L A T E !!!

With that in mind, you'd think I'd come up with something brown, or maybe sweets related huh?  Nope.  I decided that I'd start out with one of Susana's FABULOUS dies.  This die shows what I'd like my body to look like - and I don't mean the fat orange lump at the bottom lol!


I've actually used a number of dies on this card.  Blank Canvas Torso comes with the adorable matching charm.  The Garden Corner dies were cut from *Washi Tape I made, the spool and buttons are from Spellbinders, and the doily is a Cheery Lynn die.  Selected Spellbinders 30% OFF right now at SCACD!!!


The beautiful pattern on the torso is a combination of Teresa Collins Tell Your Story Washi Tape and homemade Washi Tape!  *See below for instructions.


The crocheted piece under the charm and ribbon is a flower - at least that's what the directions said LOL!  I've been teaching myself to crochet (yeah, in my spare time!).  Don't you love pins?  I do... SCACD has a ton to choose from HERE.

Washi Tape Woes...
As I was browsing through the craft store the other day, I came across some washi tape.  There wasn't anything as nice as the Teresa Collins Tell Your Story Washi Tape I've used today - actually, there wasn't much choice at all.  I ended up buying some glitter tape.

Since that dreadful washi tape experience (lol) I decided that I would make my own glitter washi tape using aluminum tape I purchased a long time ago at Walmart!  Another option is using Metal Foil Tape Sheets HERE.  I think the Metal Foil Tape sheets would be easier to work with...

How To Create Your Own Washi Tape

This is the process I used:


1.  Using a piece of scrap cardstock for size trim the metal tape.


2.  Gather sponges and 3D Stamp Paint in color(s) of choice.


3.  Making sure work surface is covered, gently dip sponge in Light Blue 3D Stamp Paint then Lime Green 3D Stamp Paint.  When using foil, you want a thicker coat. Don't glop it on, but be generous with the paint.  I dabbed each color on randomly, repeating each color until I liked it :D

It didn't take long to dry - I was VERY surprised!  Especially on a non-porous surface!  Voila' it's ready!!!

4.  Cut as desired in strips.


5.  Adhere to scrap of cardstock.  I think my washi tape fits in nicely with Teresa Collins Tell Your Story Washi Tape, don't you?


6.  Using Blank Torso/matching charm and Garden Corners dies run through die cutting machine.  Here are my first cuts :D

***Important Note***

Make sure to rinse off your sponges when you're done using them.  I needed to soak mine for a bit, but I was able to get most of the paint off.  It would have been a lot easier to put them in water right away... another lesson learned :D


This is a sample I put together to show you different effects.

1.  Narrow strip on the left:  Store bought glitter tape.

2.  Wide strip in the middle:  Rose 3D Stamp Paint on Metal Foil layered over cardstock which you can see on either side of foil.  Notice the difference in color and texture.

3.  Strip on the right:  Light Blue/Lime Green 3D Stamp Paint on Metal Foil Tape.


This was taken right after covering with paint.  You can see how it darkened up as it dried in the photo above this one...

I hope you've enjoyed learning a new technique and will try out these wonderful 3D Stamp Paints!  The colors are so vibrant and have a great texture.  You can't beat the drying time either!!!

Did You Know???
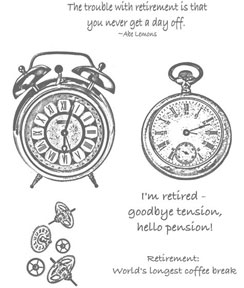
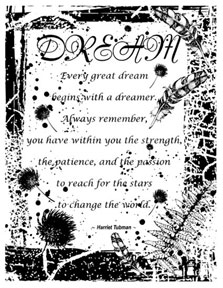
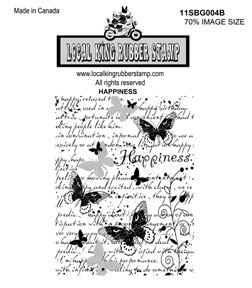
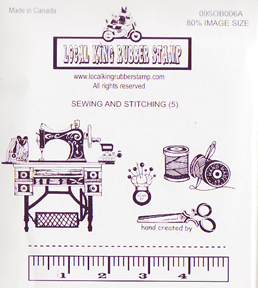
I just discovered some really cool stamps at SCACD!  They are by Local King Rubber.  Here are some of my favorites!

Local King Rubber Stamp - Timekeeper

Local King Rubber Stamp - Dream

Local King Rubber Stamp - Happiness

Local King Rubber Stamp - Sewing & Stitching

Local King Rubber Stamp - Faith

Hope you had fun... I know I did!!!

May God bless you, keep you and comfort your soul~

the countdown...

Get your own free Blogoversary button!
Related Posts with Thumbnails