Saturday, July 21, 2012

How to Create a Simple Canvas Background!

I am totally doing the happy dance today : D  : D  : D  Wanna join me?  I'd love for us to twirl around in our pretty little tutus LOL!  Oh my... what a horrendous picture I have in mind (not YOU, but MEEEEEE!!!).  I do think that I might break something as I'm not all that coordinated - not to mention your eyes... no I definitely would not put on a tutu and damage your precious eyes!  But I'm still jumping and twirling in my imaginary tutu as today I received my Vagabond.  YAY!!!!!  Can you tell that I'm just a little bit excited?  I haven't opened the package yet as I'm making myself take care of business first *sigh*

On the other hand, my house is clean and I'm purging.  Hmmmm... just might have to get to my craft room soon and see what comes up as some candy for someone!  Actually, I do have a pile going already, but I'm sure there's more.  I need to make room for new : D

Have you been wanting to create some simple backgrounds for your projects, but don't really know where to start?  Or maybe you're thinking it's too much work.  Well, I have some good news for you.  Read on...

Today's project is a canvas ATC.  I've used a very simple, but effective technique for my background!


Before we get to the background, let's talk about this great MONSTER!!!  This image is Some Days from the Oddly Sweet Curiosities Collection by Susana Loves Stamps.  These NEW (and SCACD exclusive) monster images are growing on me for sure!  They are fresh and fun!!!

If you wanted the monster without the man on the end of the hook, it would be very easy to cut him off or even if you covered him up with a post it note on your stamp before inking, then remove the post it note and stamp away!


Here's the sticky-backed canvas ATC.  First off, I need to tell you that I used the sentiment that comes with another stamp (Those Days).  It just felt right to use it here lol.  The only other paper I used on this project is a piece of cardstock under the canvas.  Of course I used my fave ScraPerfect Best Glue Ever to adhere the sentiment and image!!!

 How To:


Supplies Used:
Mister (or Mini Mister) Spray Bottle
Wild Blueberry Mica Powder
Snap Dragon Mica Powder
Soft Brush
Sticky-backed Canvas ATC

Step 1:  Cover your work surface according to the size of your project.

Step 2:  Spray the canvas ATC with water.

Step 3:  Using a soft brush, dip into the Wild Blueberry mica powder and tap it over the ATC.  I just do this randomly...

Step 4:  Repeat with Snap Dragon mica powder.  Repeat colors/spray water until desired pattern is acheived.

Step 5:  Allow to dry and embellish as desired.

*Note:  I used a piece of Shop Towel on a Roll under the ATC, covered it with another piece of Shop Towel and put the container I have my mica powder in on top for weight.  As you can see above, when wet, the ATC curls.


Here it is dry and adhered to a piece of cardstock, but it was already flat before I stuck in on : D

I did have a few problems which I'll tell you about.  First, I didn't attach the ATC very straight.  I think if I removed only a portion of the paper backing at the top, placed it on the cardstock and continued pulling the paper backing off while sticking the ATC down it would have turned out better.

Because it was wonky I wanted to straighten it out lol!  So I tried my mini paper cutter.  Don't bother with this!  I'm not sure if it was the canvas or the combination of canvas with cs - in any case, it didn't work at all!

Next I tried using my chomper to round the corners.  It did a partial job.  I ended up using my scissors to finish.  Oh well... good enough!

So all in all... my background was certainly the EASIEST thing to do on this project LOL!  I hope that I've helped you avoid some pitfalls and frustrations : D


FREEBIE NEWS!
Have you received your FREE Butterfly Shaped Card file yet?  You can find it HERE.  There's also a Challenge with prizes!!! Ends August 15.


Next up:  A Humorous Shaped Card.  Stay Tuned!


May God bless you, keep you and comfort your soul~


Sunday, July 15, 2012

How to Create a Butterfly Card - Freebie and Challenge!

Challenge and Freebie Below...

It's me again... Can you believe it?  I've actually got another fun project to share with you today woot woot!!!  Not only will I share how I made this beautiful card, but I'm also giving you a FREEBIE *insert another woot!!!*

Although it took me a little while to figure out how to get the butterfly die cut into my computer so I could create a shaped card using THIS butterfly die, the rest was a breeze!

I've been trying to incorporate my Cameo into my card making more often.  I forgot to mention in my previous post HERE that I used the beach ball template I downloaded from Paper Crafts magazine to create the shaped card with my Cameo.  It probably would have been much faster if I just used scissors for this one, but I wanted to use my Cameo so the cut would be even.  Know what I mean?  Scissors and I aren't that compatible hee hee.

On to today's shaped card. Shown here from top to bottom:  Finn Butterfly die cut; butterfly cut file layer 1 (colored with Primary Elements Mica Powder); butterfly cut file layer 2 (embossed); butterfly cut file card base.


The top layer is the GORGEOUS butterfly die cut by Memory Box.  It is approximately 3.5" x 5"  This was my inspiration : D  I LOVE butterflies!!!


Here's a better shot of the beautiful shimmer and color of the mica powder (sorry for the ugly hand and background : (  I've also given the die cut a couple coats of Ice Silks Acrylic Glaze which made it lift up naturally - yay!

Here are the materials I used to create this card:

Step 1:  Open cut file with your cutting machine (adjust size as needed) and make all cuts.  Note which piece should be BLACK.

Step 2:  Using BLACK cut out (closest size to the die cut), 'stamp' entire surface with VersaMark pad.

Step 3:  Using mica powders and a soft brush, tap the mica powder over the VersaMark covered cardstock.  I simply dip my brush into the powder and gently tap the handle to create a splattered effect.  It's not a problem to use the same brush with each mica color if you are tapping it off each time...

Step 4:  Using a larger brush (only because it's easier) gently brush away excess powder to reveal your beautiful design!  You can rework, adding more colors until you are happy with the result.

Step 5:  Spray the mica colored card stock with Fixatif and lay aside to dry.

Step 6:  Die cut Finn Butterfly.  Since this is a large, intricate die, you may need to pass through your machine more than once (depending on your machine).  NOTE:  I've finally ordered the Vagabond!  I can NOT wait!!!!!  I am anxious to see how this die cuts with the powerhouse : D

Step 7:  Using Ice Silks Acrylic Glaze, cover the die cut with one or two coats and lay aside to dry.

Step 8:  You will now have one layer and the card base left.  Emboss the layer using More Dots embossing folder and score and fold card base.

Step 9:  Assemble layers using Best Glue Ever!  You only need small dots of this glue...  It's glue on steroids lol!

Step 10:  Embellish with rhinestones and sit back and enjoy your beautiful creation!

What colors or embellishments would you like to use on your butterfly card or project?  I would love to see what you come up with!  So... how about a...

***CHALLENGE ***

Using the Butterfly Shaped Card template/cut file (see below) with an additional entry if you also use Finn Butterfly... Let's see your creations!

Challenge will begin July 15 and end August 15.  This will give you LOTS of time to prepare and even order Finn Butterfly : )

What can you win?  Well... for starters, let's just say if you are a Magnolia or Tim Holtz fan, you'll be jumping up and down!!!

  • First Prize:  Ten new or very gently used Magnolia stamps (list to come)
  • Second Prize:  Tim Holtz tiny attacher with staples and assorted accessories
  • Third Prize:  Four Embossing folders and two stencils

So what do ya say?  Wanna play?  Enter your butterfly creation with Mr. Froggy below.  Please enter a direct link to your blog post, not your blog.  Please also link this blog in your challenge post.

Thanks... and have fun!

*Edited:  Some of you have mentioned that you don't have an electronic cutting machine.  Never fear!  If you download the PDF file, you will be able to print out and cut by hand :D
Here's your FREEBIE!!!
Download Cut File Here:

Available files are:  svg, pdf, mtc, studio, png.  After clicking on the above link, click on the file extension you want and then click download.  That's it!

If you have any questions, I'd be happy to help!  My email is listed on my sidebar.

Thanks for hanging in there with me : )  I know this was a long post!

May God bless you, keep you and comfort your soul~


Friday, July 13, 2012

Fun in the Sun!

Hello my friends!  I'm so glad that you've stopped by to see me :D  I do hope that you are not melting in your corner of the world lol!  It's been sooooo hot!  Lord knows that I don't do hot very well.  It seems the older I get, the crankier I become in the heat.  No... seriously!!!  Do you think it has anything to do with menopause?  On that subject, I don't even know if I'm in it or what!?!  Two years ago I had a complete hysterectomy but because I've also had breast cancer, I can't take hormones.  I must say though that the hot flashes are not as frequent.  Oh well, whining never helps - no one seems to listen LOL LOL LOL!

So with that off my chest, I'd love for you to see what I've created with one of the latest releases from The Little Sassy Crew by Susana Loves Stamps for SCACD.  This is Little Morticia!

Isn't she fun?  Her 'thing' is that she loves to be color coordinated... even her hair!

One day I noticed this fabulous beach ball from Maria's blog and saw that she used a template from Paper Crafts Magazine.  I loved it so much that I downloaded the template myself - this is my version : )

In this photo, I'm highlighting the Ice Silks Acrylic Glaze which I used to cover the skull 'button' and also streaks of Morticia's hair!  Silks are so shimmery, and if you add Mica Powder to them, the wow factor is off the charts!!!  Susana carries tons of yummy colors to choose from.  Yep, I'm working my way to collecting them all!  Can't have just a couple, I need ALL the colors lol!

One more thing... I've decided that I'm a much better zig zag sewer than a straight stitch sewer.  Food for thought...

Here are a few products I used on this card which are not mentioned above:

Sticky Strips (applied on the back of cut out image for dimension)
ScraPerfect Best Glue Ever (no kidding, this is on my MUST HAVE list)
Tuxedo Black Memento Ink Pad - used to stamp the image
Tim Holtz Paper Clip - which isn't in the store, but Susana does have a growing number of Tim Holtz products *Here*
Onyx Black VersaFine Ink Pad - I used this to stamp the sentiment on the ticket
Distress Tool - used to rough up the edges of the beach ball

I'm hoping to enter a few challenges which I will post here...

Next up is a butterfly card you won't want to miss!

Have a wonderful (and cooler!) weekend : D

May God bless you, keep you and comfort your soul~

Friday, June 29, 2012

Fresh and Fun New Stamps Have Arrived!!!

Welcome my friends... old and new : )  I must apologize in advance if there are mistakes in my post today...  I broke my glasses and am positively blind without them.  Actually, I can see in the distance, but for reading I can not make the font BIG enough to see clearly lol!!!

A quick update on hubby:  His shoulder surgery went well, but he thinks he may have re-injured it : (  We'll see if there's been damage at his next doctor appointment.  You'd think that he would listen to his wife and call the doctor to let him know what's up, but nooooooo.  You got a hubby like that too?  hee hee.

On to the order of the day... Hop Time!!!

You are on the right track if you've come from the fabulous, Melanie!  So you don't miss out on the great inspiration, you may wish to start at the beginning.  Head on over to see Danni's awesome work!!!  If you get lost along the way, the entire line-up can be found on the store blog.

Today SCACD releases fun and fresh stamps from the Susana Loves Stamps Collections!!! We start off with the Oddly Sweet Curiosities Set which harbors the cutest little Curiosities with matching sentiments. These are Fab and definitely year around fun!!! The second Set are four wonderful little ladies that make up The Little Sassy Crew. Check 'em out - they are the gals that have a sweetness and attitude factor that are off the charts!!! We are also introducing a fun little set of Mixed Media houses called M’s Place that makes them a must have for those that love cute in their Mixed Media.

So grab a cup of coffee and enjoy the ride!!!


From The Oddly Sweet Curiosities Set by Susana Loves Stamps, I'd like to introduce you to:  Monster Mash!


Just gotta SMILE seeing this oddly sweet curiosity 
dancing with freedom and joy!!!


The gorgeous papers are from Teresa Collins Sweet Afternoon (on Sale!).  LOVE these!!!  I also LOVE how these awesome Garden Corners Dies mimic the lacy feel of the doily.  Oh how I adore lace!!!


To get the white rim around the circle die cut (using Classic Large Circle nestie) - after running through die cut machine, I left the die in place and sponged Spun Sugar Distress Ink around the inside edges and close to the image.  Since I forgot to emboss, I did so after sponging...


The sentiment, 'Dance Like No One's Watching' is included with the purchase of Monster Mash.  I really appreciate a 'free' sentiment, don't you?  If you know me, you know that I am terrible with sentiments.  It's just not a gift I possess... oh well, I can't have everything lol!  That's why we have YOU ♥


You can see a bit of floss peeking out from under the flower... it's Princess from the pink Sew Easy Floss trio.  I just discovered that the store is out of this color, but you can find other yummy colors *Here.*


Ha Ha Ha...  I know this is a rather LARGE photo of the Garden Corners die, but I wanted to make sure that you saw the Ice Silks Acrylic Glaze I painted on.  I also wanted to make sure that you saw how clean and crisp they cut.  I did not sand or trim a thing!  These Dies by SCACD work really well - which I soooo appreciate.


***Here's a tip for intricate dies:  There are a bunch of tiny pieces that will need to be removed from the die cut/die.  This is what works for me... I gently tap the end of the die on my work surface and some of the pieces just fall out.  Then I gently tap the other end.  Doing this (emphasis on gently cuz I don't want you to bang up or break anything!) removes every single piece quickly and easily!  However, I know there are holes in the back which you can use to poke out the pieces, but when I'm in a hurry, this works for me!!!


For my second card, I have More Celebrate Cake from The Little Sassy Crew by Susana Loves Stamps.  Don't get me started on what kind of cake this is... you know how much I LOVE ♥ LOVE ♥ LOVE ♥ C H O C O L A T E !!!


I chose this shot because it makes the stars shine!!!  Sorry if it's a little 'glare-y' for ya.  I covered 'em in Ice Silks Acrylic Glaze (as well as the roses).  B L I N G ! ! !


These fun papers are from Authentique Lively Collection (on Sale!).  I made the cool black pearls with my Graphite Paper Pen.  I had some tags already cut out from my old Cricut (yay new Silhouette!!!) so I stamped a small sentiment on it, but you can find Memory Box Dies Classic Tags at the store *Here.*  The button is tied with Sew Easy Floss (on SALE) in Bubble Gum (out of stock, but there's lots of others!), and topped with a self adhesive pearl.


... and here's the Garden Corners die in my fave PINK!  It's also covered with Ice Silks Acrylic Glaze.  What I love about Ice Silks is that you can cover any paper, the color shows through, and you have a wonderful shimmer and shine!


Everything (except for the panel I sewed the image to) was adhered with Best Glue Ever!  It came in very handy applying small dots to portions of the corner die cut...


Oooooops!  I made a boo boo...  I was supposed to include a stamp or two from M's Place!  Since I didn't, I'm including them all here (sorry M!!!)


M's Place

Aren't these fun???  They are available to come home with you now : D
You can get them *Here*


For our international friends, you can find all of these collections at Quixotic Paperie.  Say hello to Elaine!


Your next stop is Jeanne!

I love that you've chosen to drop by... thanks so much!!!  Happy Hopping!!!

May God bless you, keep you and comfort your soul~

Sunday, June 17, 2012

Have You Heard What's New?

Happy Father's Day to everyone celebrating today!!!  My hubby is safely tucked on the couch watching racing on TV... so I thought I'd sneak in here before I head off to get his all time fave food which is fried chicken!!!  Watch out KFC, here I come lol.

In case you've been wondering if I fell off the face of the earth, I haven't...  I'll make a loooooong story short:  hubby has had two surgeries in the last few weeks.  Nothing serious, but things needed to get done, so it's been a bit more hectic around here lately.

I am just dying to create something!  My hands haven't gotten inky or messy, but I have cut a lot of rubbah - woo hoo!!!  I can't wait for you to see what I've got up my sleeves : D

Obviously, I don't have a project to share with ya today : (  but I did want to give you a highlight of a couple of products I LOVE and wondered if you knew that SCACD carries them!  I just went shopping, and I already have the shipping notice!  Tomorrow will be Christmas for meeeeeee hee hee!!!


Tim Holtz!
Movers & Shapers Die:  Mini Sewing Room


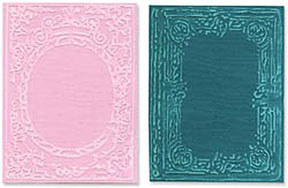
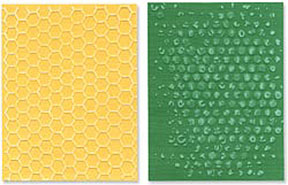
Sizzix Texture Fades Embossing Folders
Book Covers

Honeycomb & Bubble


Dies by SCACD!!!
Garden Corners


Feathers!!!
Petaloo Feathers:  I purchased Cream and Pink of course... : )


Fun, huh?  I can't wait until tomorrow!  There are other products, but I haven't used them yet, so I can't officially LOVE them... yet.  Don't worry, I'll give you honest feedback!

Enjoy the rest of your day/evening...  I've missed you!!!

May God bless you, keep you and comfort your soul~

Tuesday, June 5, 2012

Candy Winner Announced!!!

Hello sweet friends!  I've had a wonderful weekend spending time with my hubby. On Friday, we went on a date and watched two good movies from Redbox.  The first was War Horse (excellent movie!); the other was The Vow (more girlie, but I thought it also was excellent!).

On Saturday morning we went to breakfast and later that evening, watched Part 1 and 2 of The Hatfields and McCoys.  In the afternoon, we visited a good friend in the hospital.  Unfortunately, he had a stroke... but it was good to speak to him about Jesus before he was released to recover at home.

Really makes one think about how short our time on earth can be.  Tomorrow is not promised, but eternity in heaven is... if you've given your life to Jesus : )

As some of you know, I just celebrated 5 years of being healed of cancer.  Maybe you've gone through something similar, or maybe not similar, but still a very painful situation.  The only way I got through the horror was by holding on to the hand of Jesus.  So can you!  Do you need some encouragement?  Please feel free to email me (on sidebar).

Now, as I realize how far He's brought me, it's truly a miracle!  This is the JOY that I wish to share with you... and part of the reason why I love to give.  So, finally, here's the winner of my 5 Years of Healing Candy:


That's you, Rufus!!!  Congratulations!  
Please reach out to me in the next 48 hours so I can send your new 
Tonic 12" Paper Cutter out to you.

How did I get this winner?  If you had a correct answer to a previous riddle post, you received 5 extra entries.  One person entered before Rufus with the correct answer, so I added 5 + 15, resulting in #20 - Rufus!!!

Thank you, everyone, for playing along with me.  You are the best : )  And you know this isn't the last you'll hear from me lol!  I have lots of fun up my sleeves!!!

See you soon...  I love you to pieces

May God bless you, keep you and comfort your soul~

Friday, June 1, 2012

New Dies, New Techniques and New Stamps!!!

Welcome back friends!  A lot has happened in my world since my last post.  Some good, some not so good... but that's how the cookie crumbles!  Now what kind of expression is that?  Does that happen to you too?  It just kinda pops in your head and right through your tapping fingers to the keyboard... hmmmm...  Exactly how does the cookie crumble?  Oh well.

Without further pondering on that subject, I need to tell you that my CANDY post didn't have an ending date (yikes!).  I intended to end on May 31 (I'm assuming that Mr. Linky will expire at midnight).  If that is the case, and you didn't get a chance to enter, I will leave it open for a few more days.  The NEW ending date will be June 4 at 11:59 pm.  I will include the link to enter at the bottom of this post...

It's Hop Time!


If you've come from Melanie's blog, you've seen some amazing work, and are on the right track.  If you'd like to start at the beginning, head on over to see what Danni has cooked up for you.  She's sure to bring a big smile to your face :D  If you get lost along the way, you can find the entire line up on the Store Blog.


Here at SCACD we've been "die"ing to mix things up!  So, this month we have the launch of two awesome new Collections.
First is a fantastic new line of dies.  Susana has collaborated on a collection of dies with a timeless, classic feel.  Delicate and beautiful, the diecuts from these high quality wafer thin metal dies will be featuring on your projects for years to come!
Second is a wonderful new direction for SCACD.  Susana is following her heart with a new line of Mixed Media stamps.  For those of you who are new to the concept, Mixed Media is a style that embraces creativity and experimentation. Let SCACD take you on a new creative adventure with the Blank Canvas Collection.  From the beginner to the mixed media enthusiast, these stamps will have the creative juices well and truly flowing! 
Each set in the collection comprises looks, perfect for mixing it up with different techniques.  Use the elements set to enhance the blank canvas silhouettes, or use them on their own for gorgeous effects.
In addition there is a fabulous set of word outlines, ready to be customized however you like!  Color them in, doodle, zentangle, paper piece - go wherever your creativity takes you.
Mix it up and most importantly - HAVE FUN!


Brand New Dies by SCACD!!!

I am so happy and excited to finally get to show you the awesome new dies that are in the SCACD house!  I'm only showing you two, but there are 6 others (as I'm sure you've seen if you are hopping along with us today!)

On my card, I've used Nature's Tapestry Fan and one of the two corners in the Classic Corners set.  You can find the entire collection *Here*

 I've kept the card simple so that the dies can SHINE!!!

Isn't this fan just gorgeous?  The detail is amazing and oh-so-delicate!  I've used VersaMark and *LuminArte' micas to make this one colorful and shimmery fan :D  *Tutorial with specific colors below...

The dies cut perfectly!  As you can see in this closeup, the cut is crisp, without fraying or tears.  Isn't the color fun?  With the mica powders, there are SO MANY colors to choose from, you will surely find something to fit your project easily.  I am well on my way to collecting ALL of them lol!  You know that I have to have all the colors in everything...  I might NEED one I don't have yet!!!

So, here's how I made the magic happen:

I 'stamped' VersaMark on Kraft die cuts - here, obviously the corners... 

Here are the colors of mica powder I used.  In case you can't see in the photo, they are:  Blue Flame, Stargazer and Snap Dragon.

After coating the fan die cut with the VersaMark ink pad, I used a soft brush  to dab on the mica powder - this is Stargazer.  Since the VersaMark is tacky, the powder sticks really well.

I randomly covered the inside detail with more Stargazer, Blue Flame and Snap Dragon mica powders.  Ta Da!!!  Sooooo easy I tell ya!

Although you don't have to, since I didn't use Gum Arabic mixed in with the micas (which is a binding agent) I sprayed on a workable fixative by Krylon to keep the mica from smearing.  It really does make a difference.

Mixed Media Fun!!!

Boy oh boy did I have fun!  The new Mixed Media Blank Canvas Collection by Susana Loves Stamps has so many possibilities.  It was a bit hard at first deciding what I wanted to do, but after a few contemplative moments, I felt a FREEDOM that I hadn't experienced before :D   I'm tellin' ya that this collection will bring you to a new creative place you didn't know you had!  The only thing is... are you brave enough to enter in??? lol

Here I've used Blank Canvas Profile and Solid Canvas Profile.  What do you mean you can't see the solid?  Just wait... you'll see : D

The lined image is Blank Canvas Profile.  I began by stamping her with VersaMark and embossing with pink embossing powder (try THIS one from SCACD!)  Next, I wrote the word "freedom" with black permanent ink pen.  When I was sure that was dry, I stamped Solid Canvas Profile (using VersaMark) on top and sprinkled clear embossing powder over the entire image.

When the image was embossed and cooled, I used a foam brush to paint Pixie Pink Silks over the entire piece of cs, not worrying about whether or not it was a consistent thickness or color (some areas are darker, some are lighter).  I used a damp cloth to wipe away the color on the embossed image.


Again, using a black permanent ink pen, I wrote "Whatever is pure, think on these things" around the image.  It may be a little hard to tell the shape, but I used one of the new Tim Holtz embossing diffusers to create a circle around the image.  I'm not entirely sure I used it correctly, but you can see that the image  doesn't have any embossing in it.  The rest of the card has the embossed lines from the Scrollworks embossing folder.  I distressed the raised embossing a bit with Black Soot distress ink.

A few Graphite Paper Pen pearls and hearts, some zebra ribbon and bling, and a tiny tag (Susana carries THESE by Memory Box) tied with Scrapper's Floss are all that's needed to finish this one of kind, heartfelt card!

There you go... from me to you


♥ DID YOU KNOW... that SCACD carries VersaMark refill ink???  Just thought you'd like to know cuz I just found it :D

Now remember, our International friends can find these amazing new stamps *Here* and dies *Here* at Quixotic Paperie!!!

*CANDY LINK* - ends June 4

Your next stop is Mary J

Thanks so much for hanging in there with me : D

May God bless you, keep you and comfort your soul~

Tuesday, May 15, 2012

I Love Happy Mail!!!

Guess what I got in the mail?  Well, kinda.  It wasn't in the mailbox, but the delivery man delivered it!  My new Cameo arrived - yay!!!  So far, I've set everything up and cut a GORGEOUS background which is on my card today : D  I was amazed at how many files are available on the Silhouette web site.  I bet I have half of them on my wishlist LOL

I really wanted something to cut intricate designs - I LOVE lace!!!  The Silhouette did a great (not perfect) job of cutting the details.  What I wasn't expecting was the laborious clean up on the cutting mat.  I don't know WHY I didn't think about it - even with the Cricut, the small pieces need to be removed.  I suppose that I was already in love with what the Cameo could do, that it didn't matter about the mess to clean up after hee hee

It's kinda like having a baby... you forget about the 'pain' cuz you have such a beautiful baby to love ♥  I know, I know - NOT the same thing lol

I hope you enjoy my 'labor' of love...  I've used another one of Chelsea's awesome sketches for CLP Sketch Challenge #47.  Come join us!

This is Happy Mail Peeker by Elisabeth Bell for SCACD.  Isn't she darling?

She's colored with copics and accented with Ice Silks 
(LOVE the intensity of the bling!)

A close up of the Silhouette cut in the background, and fussy cuts I chose from the beautiful dp by Prima, Meadow Lark - all glued down with my fave ScraPerfect Best Glue Ever!!!

Do you see all those teeny tiny holes?  I'm sure you can guess what a joy it was to scrape off the cutting mat.  I NEED to get a scraper - I'm sure it will be a lot easier then.  Will that stop me from cutting MORE like this?  No way!!!  You can be sure to see this cut again and again hee hee.

Challenges Entered:
Papertake Weekly - In the Garden
CES - Anything Goes
Just Keep on Creating - Anything Goes
2 Sisters Challenge - Make it Girly

Thank you for taking the time to visit!

Have you entered my Tonic Paper Cutter Giveaway yet?  You can find the post Here.

Watch for more SCACD FUN to come in the next couple of weeks!  Have a great week, my friends ♥

May God bless you, keep you and comfort your soul~

Monday, May 7, 2012

Vintage and Distressed!

Hello lovelies : D   Guess what?  I've finally taken the plunge and ordered a Silhouette Cameo!  Yay!!!  I am SOOOOOO excited!  On Saturday, I sold my Cricut Expression and am on my way to selling the last of my cartridges.  I must say that it is FUN to sell on ebay!

So... how many of you already own a Cameo?  Is it as awesome as I keep hearing? What kinds of projects have you made with it?  I hope that it won't be too long before I get mine...

If you've made something with your Cameo, would you mind leaving a link to your creation on this post?  I'd LOVE to see what you've made!

And now, I'd like to share a tag I made using one of the new PEEKER stamps by Elisabeth Bell for SCACD.  As you know, my style is usually neat and tidy - BUT today I've gone waaaaaaaaaaaaaay out of the box!!!  You know what?  I actually liked it!


Different, huh?  
I'm hoping that I've made the torn image look burned.  
What do you think?


The background on this tag is from the 'left-overs' on the card from my previous post.  If you'd like to see how I made it, check it out *HERE*

Supplies Used for Today's Distressed Tag

Coloring:  Copic Markers
LuminArte' Glaze:  Ice Silks
LuminArte' Mica:  Solar Gold
Picture 'Glass':  Transparent Gloss Gel
Blue Pearls:  Cobalt Blue Paper Pen, but *Here's* a substitute
Distress Ink:  Tumbled Glass, Vintage Photo, Black Soot
Embellishments:  Gold Tulle, Ribbon Lace, 1/4" Ribbon, Button
Tag:  Cardstock cut with Cricut Expression


Thanks for taking a peek and for leaving any comments : D  
Remember, I'd love to see what you've made with your Cameo!!!

May God bless you, keep you and comfort your soul~

Tuesday, May 1, 2012

Making Your Own Backgrounds

Hello friends and welcome back!  I have some fun planned for ya today : D  If you've read my last couple of posts, this will be somewhat of a review, but I'm sure you'll pick up a few ideas or maybe even have an 'a-ha!' moment lol!

I've been having SOOOOO much fun playing with my new goodies from Susana's Custom Art & Card Design.  Susana carries the best products, it's hard to choose what to use first!

I finally decided on this little cutie called Knowledge is Power Angel by Elisabeth Bell for SCACD.  I even dusted off my Lacey Ovals Nestabilities die which I paired with Classic Large Oval Nestabilities die : )


This stamp has been been released before, but because she's one of our favorites, Susana has decided to Re-Release the whole collection of beauties!!!  She's from the Guardian Angel Collection.  But wait... there is one Brand New Angel you may spy at the store (or have seen on my blog!).


Here's the full background.  You can see the great texture the Embossing Paste provides.  Susana carries different colors of Embossing Paste so you can create just the right look!

The flower (although not handmade) was stained with Vintage Photo Distress Stain.  I've decided that I LOVE distress stains.  At first I thought, "Why?"  there are re-inkers... but now I see the difference cuz the re-inkers will lose the intensity of the color when you add water, but you can see the richness of the dark brown in the bottom petals.  The top petals were pressed on the already distressed petals, so it got a kind of 'second generation' distress : )

Tulle behind, and a cute li'l button center and it's ready to glue on using... you know it - ScraPerfect Best Glue Ever lol!  Yes, I am in LOVE with glue ♥


Oooooh, a better shot of that texture lol!  If you look closely, you can see the bottom layer, which is stamped text.  Lots of beautiful layers to enjoy : )

Wanna know to get this look?  Here ya go...


Making Your Own Background

Of course there are many many ways and products one can use to create different backgrounds.  I'm going to show you how I created the background I used on my card today.


First step:  Using Archival Ink *Here* or *Here* and rubber stamp, I stamped the text on a sheet of 8 1/2"x 11" four times.  Any size paper/stamp can be used.  This isn't the stamp I used, but is a cool text stamp (which I want!).


Second Step:  Tape down the Damask stencil (using removable tape) and apply Black Embossing Paste, icing as you would a cake!


Third Step:  Carefully lift up the Damask stencil, revealing a beautiful design!  After about an hour, reapply the stencil and tap an embossing pad (I used VersaMark Dazzle) on open areas of stencil.


Fourth Step:  Apply Stargazer Mica Powder (or color of your choice) with a soft brush.  Stargazer is a beautiful blue color, but on top of the Matte Black Embossing Paste, it turns a pretty teal color!

For my card today, I spritzed the paper with water and brushed on more Stargazer.  When that was dry, I added Ice Silks and used my finger to add Solar Gold Mica Powder on bits and pieces.

* Solar Gold Mica Powder doesn't have a base color, but on top of the color I already laid down, it shows up beautifully!

I cut the paper for my background (5"x5") and had some left over which I will show you on my next post!


Well, to be perfectly honest... you don't!  However, there are some definite benefits to using this amazing cleaner!  Take a peek below.  Nothing has been retouched.  These are 'as is' photos!


I scrubbed as best I could, but I didn't want to rip the intricate design...  Soap and water removed the major part of embossing paste, but certainly left a lot behind!


Look how CLEAN the ScraPerfect Best Cleaner Ever worked on this stencil!!!  I mean even the nooks and crannies of this intricate stencil got clean.  It's AMAZING!  You can click on the photo to make it larger so you can see in detail.

...and of course, I used ScraPerfect Best Glue Ever to adhere my ENTIRE card!

Whew!  I bet you thought that I'd never end..

Interested in some CANDY?  Need a Brand New Paper Cutter?  I've got one to give away!  It's a whopping 12"x12" and it's a TONIC - I just LOVE LOVE LOVE mine!!!

Enter Candy *HERE*

Lots and lots of love to you!!! ♥

May God bless you, keep you and comfort your soul~

the countdown...

Get your own free Blogoversary button!
Related Posts with Thumbnails