Showing posts with label Silhouette Cut File. Show all posts

Sunday, June 9, 2013

DIY Onesies and Free Cut File!

Hey friends! Once again, I've forgotten to let you know that I have a tutorial up on the Scrap Girls Blog... I show you step by step how to create cut files using images from your digital scrapbooking stash! I tell ya, I've been having SO MUCH FUN!!! It's limitless on the files you can create yourself :)

Also, there's still time to check out the awesome Silhouette promotion featuring Heat Transfer Material. This is what I've used to adorn the Onesies below!

I'd like to enter this project in the following Challenge:
613 Avenue Create - Anything Goes/Twist Celebrations (New Baby!)


Today I am offering the train cut file. Check back for the other cut files which will be offered throughout the week :)

Download HERE.

Tutorial and promotion is HERE.

Thanks for stopping by today!

May God bless you, keep you and comfort your soul~

Wednesday, May 29, 2013

It's a Cupcake Kind of Birthday!

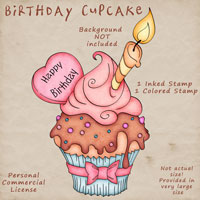
Hello everyone! I'm back with a cute li'l card for this week's challenge at The Paper Shelter. This time, we'd like to see your Shaped or Easel Cards! I knew just the card I wanted to make for this challenge, as it was just my dear friend's birthday :) I took the Birthday Cupcake image and turned it into a print and cut - I really LOVE doing that lately, as you've probably noticed lol.

From the print and cut image, I created this li'l card:


Doesn't it look yummy?  It's colored with copics and accented of course with Stardust Stickles.

I'm entering the following challenges:
Simon Says - Anything Goes
Sister Act - Anything Goes
Great Impressions - Celebrations
Whimsy Stamps - Anything Goes
Wags 'n Whiskers - Anything Goes
Love To Scrap! - Color My World (pastels)

Won't you join in this week's fun? Here's what you could win:


Anyone playing along using a TPS image will be eligible to win a $30 Gift Voucher! You can also play using another image, and you will be eligible to win 3 images of your choice!

How fun is that? Put on your thinking caps and link up your card HERE.

In case you've been wondering what's in the background of my card, it's a 6x6 tile I created for my friend's birthday. It's not only there to make you guess, it's actually propping up the card (otherwise it wobbles AND falls down!). Here's a full view...


I've created two of these so far... and still not one for myself. I want one lol!
I first saw a version of this type of monogram at Debbie's Paper Pulse. She created a video showing how she made hers. Very cool!

I've used Silhouette Vinyl and a tile I purchased at Lowe's. The thing that took the longest is setting up the design, but soooo worth it!

That's it from me today... Oh I can't wait to show you what's coming up for BABY :) Sooooo adorable!!!

See you soon, my sweet friends

May God bless you, keep you and comfort your soul~


Saturday, January 5, 2013

Pocket Full of Hearts Cut File Freebie

I've been designing again.  It feels so good to create, doesn't it?  One takes nothing but an idea and turns it into something!  In my case, hopefully something nice lol!

I've been thinking about hearts and love lately.  A friend's daughter is getting married next month!  Obviously, Valentine's Day is just around the corner also...

Here's my contribution to love... from me to you ♥


This is a Silhouette cut file.  
You can download


Have you had a chance to take a peek at my Giveaway?  
You can find it 


May God bless you, keep you and comfort your soul~

Friday, November 9, 2012

A Stroller Card with Little Bo Peep!

Good morning my sweet friends.  Another week has quickly gone by, and I feel that I haven't accomplished everything that I'd like to.  Sometimes life can be quite overwhelming, but thank God they don't last forever!

Last Friday we celebrated our youngest son's birthday.  He requested homemade pizza, so I took out my recipe which uses my beloved Vitamix.  Oh this appliance does quick work of mixing the dough.  I've used it many times and each time, the pizza crust turns out great!  My oldest son is the pizza chef :D  He makes the best toppings!  So between the two of us and double chocolate cake, we had a mouth watering celebration :D

Although far from being a baby, my youngest son IS the baby.  I do have a soft spot for baby things.  Do I want one?  Heck no!  But you gotta admit, the sweet smell of baby powder and the super cute baby 'everything' makes one smile!!!  So when I first saw this oh-so-adorable image by Elisabeth Bell for SCACD, I knew that I wanted to create a baby card.  As I strolled (hee hee) through my Silhouette files, I came across this sweet stroller - perfect!


I altered the single cut file into a card by mirroring it and placing perforations in the center to make it easier to fold.  I also cut out two more singles which I adhered one on top and one on the bottom of the card both for stability and also so I could emboss just the top layer.


Peek-a-boo!!!  The inside reveals Little Bo Peep by Elisabeth Bell for SCACD which I colored with copic markers (ShinHans HERE) and accented with Art Anthology Gelate in Splashed (Dimensional Gel Paint).  If you look at the wheels of the stroller, you'll see the clear sparkle and texture which I applied with a sponge dauber.

Papers are from Lost and Found Market Street by My Mind's Eye (lots of other fabulous paper HERE) which I used for the inside of the card.  I altered the cut file to cut only the top, then bottom portion of the stroller so I didn't have to cut out the entire image twice with the dp.


I've used a Cuttlebug embossing folder, but you can find a similar embossing folder HERE or HERE.  The cute li'l sheep and butterfly is also a Silhouette file which I cut out with my Cameo and pieced together with my Quickie Glue Pen.  Everything else was adhered with my fave ScraPerfect Best Glue Ever!

Before I took the pieces off the cutting mat, I colored them using copic markers.  I've found that doing this not only saves paper, but also time because I can decide the colors as needed and match to whatever color scheme I'm using.

A pink rhinestone on each end of the stroller and one on the butterfly give this card a little extra bling, while the buttons tied with white Scrapper's floss add charm!

Be sure to check out the Store Blog for ongoing inspiration, information and fun!!!

By the way...this is going to be the next pad of paper I purchase - wait, maybe I shouldn't share it with you... please leave me some lol!


10% off HERE

Thanks for visiting.  YOU make this all worthwhile!!!

May God bless you, keep you and comfort your soul~

Sunday, July 15, 2012

How to Create a Butterfly Card - Freebie and Challenge!

Challenge and Freebie Below...

It's me again... Can you believe it?  I've actually got another fun project to share with you today woot woot!!!  Not only will I share how I made this beautiful card, but I'm also giving you a FREEBIE *insert another woot!!!*

Although it took me a little while to figure out how to get the butterfly die cut into my computer so I could create a shaped card using THIS butterfly die, the rest was a breeze!

I've been trying to incorporate my Cameo into my card making more often.  I forgot to mention in my previous post HERE that I used the beach ball template I downloaded from Paper Crafts magazine to create the shaped card with my Cameo.  It probably would have been much faster if I just used scissors for this one, but I wanted to use my Cameo so the cut would be even.  Know what I mean?  Scissors and I aren't that compatible hee hee.

On to today's shaped card. Shown here from top to bottom:  Finn Butterfly die cut; butterfly cut file layer 1 (colored with Primary Elements Mica Powder); butterfly cut file layer 2 (embossed); butterfly cut file card base.


The top layer is the GORGEOUS butterfly die cut by Memory Box.  It is approximately 3.5" x 5"  This was my inspiration : D  I LOVE butterflies!!!


Here's a better shot of the beautiful shimmer and color of the mica powder (sorry for the ugly hand and background : (  I've also given the die cut a couple coats of Ice Silks Acrylic Glaze which made it lift up naturally - yay!

Here are the materials I used to create this card:

Step 1:  Open cut file with your cutting machine (adjust size as needed) and make all cuts.  Note which piece should be BLACK.

Step 2:  Using BLACK cut out (closest size to the die cut), 'stamp' entire surface with VersaMark pad.

Step 3:  Using mica powders and a soft brush, tap the mica powder over the VersaMark covered cardstock.  I simply dip my brush into the powder and gently tap the handle to create a splattered effect.  It's not a problem to use the same brush with each mica color if you are tapping it off each time...

Step 4:  Using a larger brush (only because it's easier) gently brush away excess powder to reveal your beautiful design!  You can rework, adding more colors until you are happy with the result.

Step 5:  Spray the mica colored card stock with Fixatif and lay aside to dry.

Step 6:  Die cut Finn Butterfly.  Since this is a large, intricate die, you may need to pass through your machine more than once (depending on your machine).  NOTE:  I've finally ordered the Vagabond!  I can NOT wait!!!!!  I am anxious to see how this die cuts with the powerhouse : D

Step 7:  Using Ice Silks Acrylic Glaze, cover the die cut with one or two coats and lay aside to dry.

Step 8:  You will now have one layer and the card base left.  Emboss the layer using More Dots embossing folder and score and fold card base.

Step 9:  Assemble layers using Best Glue Ever!  You only need small dots of this glue...  It's glue on steroids lol!

Step 10:  Embellish with rhinestones and sit back and enjoy your beautiful creation!

What colors or embellishments would you like to use on your butterfly card or project?  I would love to see what you come up with!  So... how about a...

***CHALLENGE ***

Using the Butterfly Shaped Card template/cut file (see below) with an additional entry if you also use Finn Butterfly... Let's see your creations!

Challenge will begin July 15 and end August 15.  This will give you LOTS of time to prepare and even order Finn Butterfly : )

What can you win?  Well... for starters, let's just say if you are a Magnolia or Tim Holtz fan, you'll be jumping up and down!!!

  • First Prize:  Ten new or very gently used Magnolia stamps (list to come)
  • Second Prize:  Tim Holtz tiny attacher with staples and assorted accessories
  • Third Prize:  Four Embossing folders and two stencils

So what do ya say?  Wanna play?  Enter your butterfly creation with Mr. Froggy below.  Please enter a direct link to your blog post, not your blog.  Please also link this blog in your challenge post.

Thanks... and have fun!

*Edited:  Some of you have mentioned that you don't have an electronic cutting machine.  Never fear!  If you download the PDF file, you will be able to print out and cut by hand :D
Here's your FREEBIE!!!
Download Cut File Here:

Available files are:  svg, pdf, mtc, studio, png.  After clicking on the above link, click on the file extension you want and then click download.  That's it!

If you have any questions, I'd be happy to help!  My email is listed on my sidebar.

Thanks for hanging in there with me : )  I know this was a long post!

May God bless you, keep you and comfort your soul~


the countdown...

Get your own free Blogoversary button!
Related Posts with Thumbnails